Insulating a pitched roof from inside involves fitting insulation between rafters, leaving a 50mm ventilation gap, adding a vapour control layer, and finishing with plasterboard. This method reduces heat loss, improves energy efficiency, and is widely used in UK loft conversions and home upgrades.
Pitched roofs are common across UK homes, designed to shed rainwater while creating usable loft space. However, without proper insulation on roof areas, up to 25% of heat can escape. This leads to higher energy bills and colder indoor temperatures.
This guide explains how to insulate a pitched roof from inside properly, including methods, materials, and UK building regulations for long-term performance.
When Should You Insulate at Rafter Level?
Internal insulation at rafter level is typically used when:
- Converting a loft into a living space
- Upgrading insulation in an existing roof
- Improving energy efficiency without removing roof tiles
This approach creates a cold roof system, where insulation is installed between and below rafters while maintaining airflow above.
Pre-Installation Checklist (Do Not Skip)
Before starting any insulation of pitched roofs, carefully inspect the roof:
- Check for leaks, cracked tiles, or damp patches
- Ensure rafters are strong, dry, and undamaged
- Measure rafter depth and spacing
- Identify electrical wiring and pipework
- Plan insulation thickness based on UK standards
- Allow for a 50mm ventilation gap
Skipping these steps can lead to condensation, poor performance, and costly repairs later.
If structural issues, ventilation concerns, or insulation planning seem complex, it’s advisable to consult experienced roofing contractors in London who can assess the roof and recommend the right insulation approach.
Tools and Materials Required
Essential Tools
- Tape measure
- Insulation saw or sharp knife
- Straight edge
- Drill and fixings
- Staple gun
Common Insulation Materials
- Mineral wool (affordable and easy to install)
- PIR boards (high thermal efficiency)
- Fibreglass insulation
- Cork boards (eco-friendly option)
Additional Components
- Vapour control layer (VCL)
- Timber battens (if required)
- Plasterboard for finishing
How to Insulate a Pitched Roof from Inside: Step-by-Step
Step 1: Prepare the Loft Area Properly
Clear the loft space completely so you can work safely. Remove old insulation, dust, and debris.
Inspect the roof carefully:
- Look for damp patches or water stains
- Check for mould or musty smells
- Examine rafters for cracks or rot
Fix any issues before installing insulation. Adding insulation over damp or damaged timber can trap moisture and cause long-term problems.
Also, locate electrical wires and pipes. Avoid covering them tightly, leave space for safety and maintenance.
Step 2: Measure the Rafters Accurately
Measure:
- The gap between rafters
- The depth of the rafters
Write these down. Insulation must fit tightly without being compressed.
Tip: Cut insulation slightly larger (5–10mm extra) so it fits snugly without gaps.
Step 3: Create a 50mm Ventilation Gap
Leave a 50mm air gap between the insulation and the roof covering.
This airflow:
- Prevents condensation
- Protects timber from rot
- Reduces mould risk
Use rafter vents or spacers to maintain this gap if needed.
Step 4: Install Insulation Between Rafters
Cut insulation to size and fit it between rafters:
- Push gently so it stays in place
- Ensure no gaps at the edges
- Avoid compressing the material
Soft insulation like mineral wool will hold by friction, while rigid boards may need fixing with battens or clips.
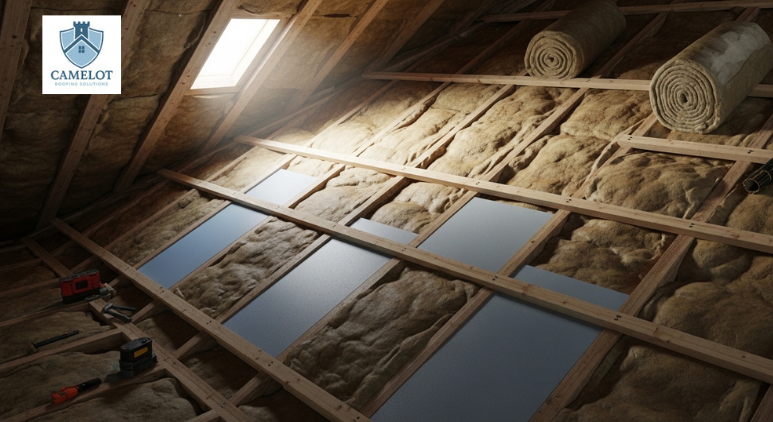
This is the main layer responsible for reducing heat loss.
Step 5: Add Insulation Under the Rafters
For better performance, install rigid insulation boards across the underside of the rafters.
This helps prevent thermal bridging, where heat escapes through timber.
- Fix boards using screws or battens
- Ensure tight joints with no gaps
This extra layer significantly improves overall insulation efficiency.
Step 6: Install the Vapour Control Layer (VCL)
Cover the insulation with a vapour control layer on the warm side (room side).
This prevents warm, moist air from entering the roof structure and forming condensation.
Important:
- Staple securely across rafters
- Seal all joints with tape
- Avoid gaps or holes
Step 7: Finish with Plasterboard
Fix plasterboard over the insulation to create a smooth ceiling:
- Screw boards into rafters or battens
- Align properly
- Fill joints with plaster
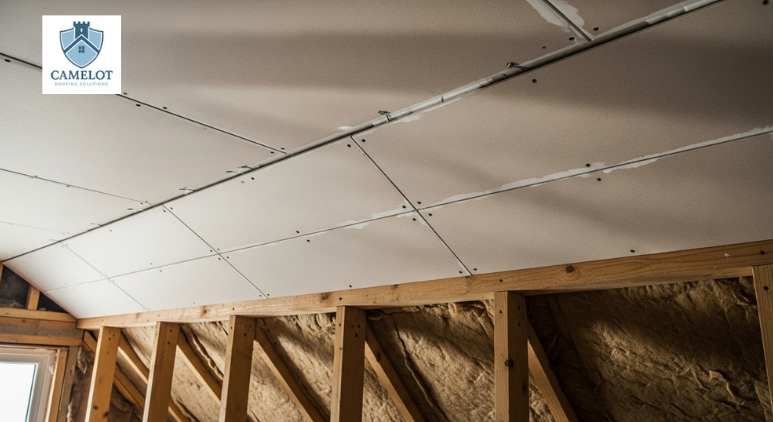
This final step completes the process of how to insulate a pitched roof from inside.
Why Internal Roof Insulation Is Worth It
Properly installed pitched roof insulation:
- Reduces heat loss by up to 25%
- Lowers energy bills
- Improves indoor comfort
- Prevents condensation and damp
- Extends roof lifespan
- Increases property value
A well-insulated roof also reduces pressure on heating systems and lowers carbon emissions.
UK Building Regulations You Must Follow
Roof insulation must comply with Part L of the Building Regulations.
Typical targets:
- England & Wales: 0.16 W/m²K
- Scotland: 0.12 W/m²K
If these cannot be achieved, insulation must still be improved as much as possible without exceeding 0.35 W/m²K.
Correct insulation thickness and proper installation are essential to meet these standards.
Common Mistakes to Avoid
- Blocking ventilation airflow
- Leaving gaps between insulation
- Skipping the vapour control layer
- Using insufficient insulation thickness
- Installing over damp or damaged timber
These mistakes can lead to condensation, mould, and expensive repairs.
Should You DIY or Hire Professionals?
While DIY installation is possible, precision is key. Even small errors can reduce effectiveness.
Based on professional roofing experience across UK residential projects, incorrect airflow and poor insulation fitting are the most common causes of failure.
For best results, many homeowners choose professional roof installation services to ensure proper installation, correct insulation thickness, and full compliance with building regulations.
Conclusion
Insulating a pitched roof from inside is one of the most effective ways to improve energy efficiency and comfort in your home. By combining the right materials, proper installation techniques, and compliance with UK standards, you can create a warm and energy-efficient living space.
Whether you’re upgrading an existing loft or planning a conversion, investing in high-quality roof insulation delivers long-term savings and performance.
If you’re unsure about insulation thickness or ventilation requirements, it’s always best to consult local roofers in London to avoid costly mistakes and ensure lasting results.
FAQs
Do you always need a ventilation gap?
Yes, a 50mm air gap is essential to allow airflow and prevent moisture buildup that can damage the roof structure.
What is the best insulation for rafters?
PIR boards offer the highest thermal performance, while mineral wool is more affordable and easier to install.
How thick should insulation be?
Typically 100–150mm between rafters, plus an additional layer below, depending on materials and building regulations.
Is insulating a pitched roof from inside effective?
Yes, it is one of the most common and effective methods used in UK homes, especially for loft conversions and retrofits.