A conservatory can be a stunning addition to any home, providing natural light, extra space, and a closer connection to your garden. But one common problem homeowners face is poor thermal performance. Without proper conservatory roof insulation, conservatories can be unbearably hot in summer and freezing cold in winter.
If you want to maximize comfort and reduce energy bills, knowing how to insulate a conservatory roof correctly is crucial. This guide covers the step by step guide most effective insulation methods, expert recommendations, and tips to help you maintain a warm, energy-efficient, and inviting conservatory all year long.
Why Conservatory Roof Insulation Is Essential
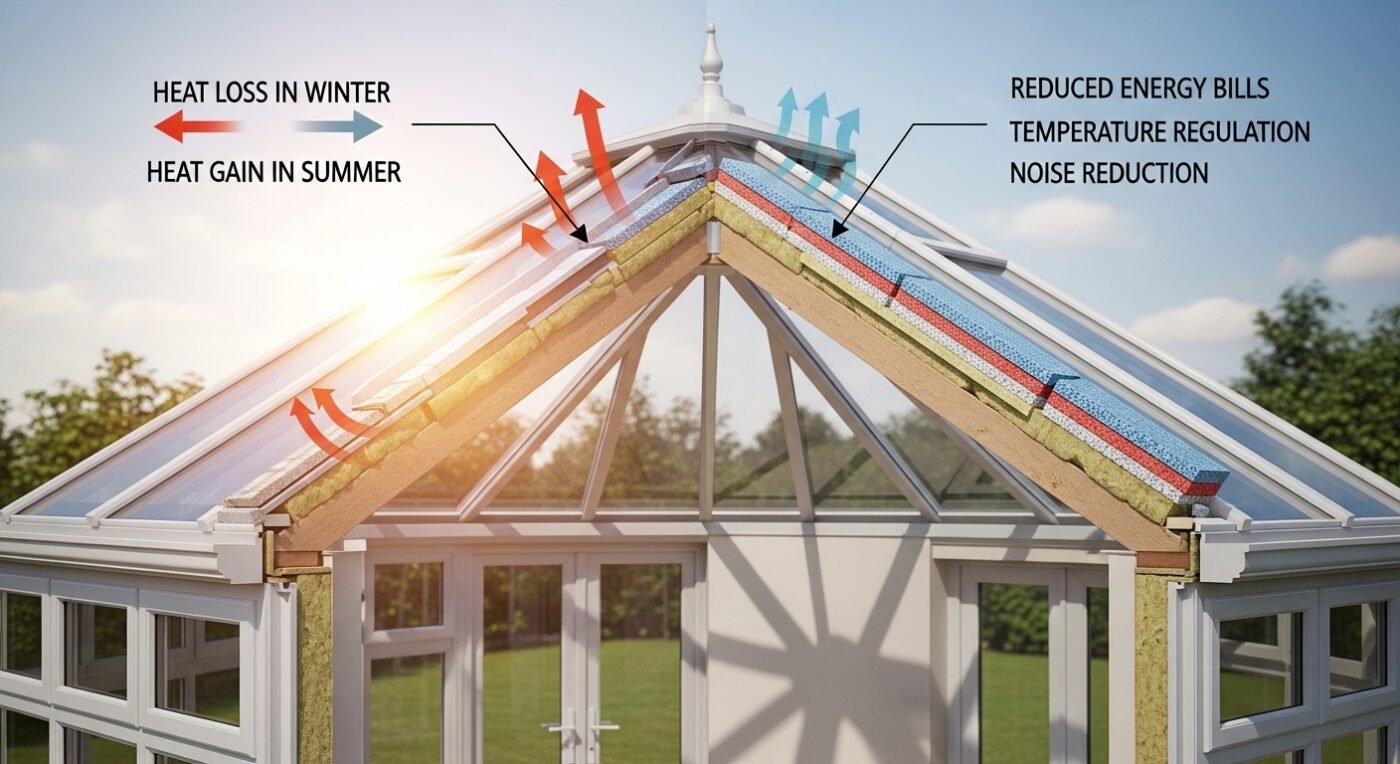
Conservatories are often the weakest part of home insulation. Typical glass or polycarbonate roofs allow heat to escape and sunlight to pour in unchecked. The benefits of proper conservatory roof insulation include:
- Thermal comfort: Enjoy your conservatory in all seasons.
- Energy efficiency: Reduce heating and cooling bills.
- Noise reduction: Insulated conservatory roof panels help block rain, wind, and outside noise.
- Condensation prevention: Proper insulation for conservatory ceilings reduces damp issues.
- Increased property value: A well-insulated conservatory is more attractive to buyers.
How to Insulate a Conservatory Roof: Step-by-Step Guide
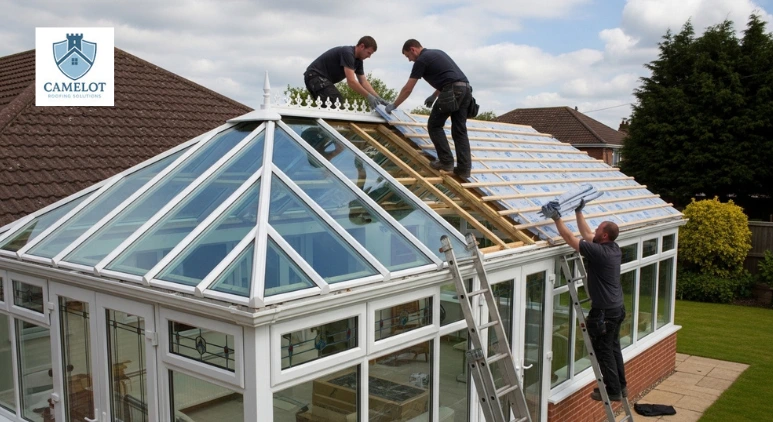
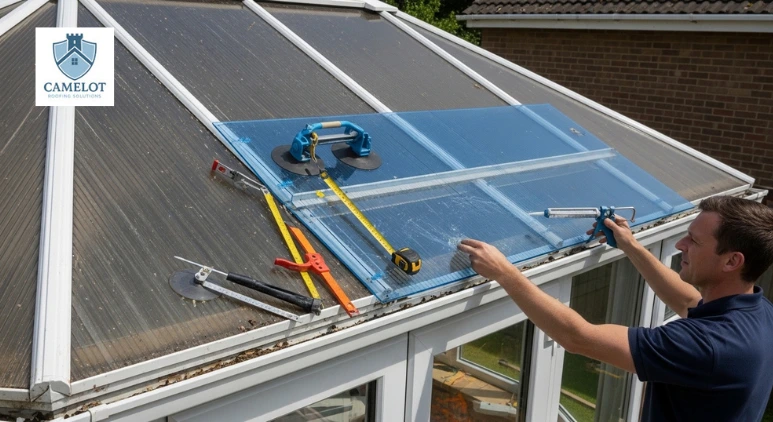
Step 1: Identify the Type of Conservatory Roof
The first step in insulating conservatory roof is identifying the type of roof structure you have. Conservatories typically feature glass, polycarbonate, or solid/tiled roofs, and each requires a different insulation approach. Glass roofs allow maximum daylight but provide poor thermal insulation, while polycarbonate roofs are lightweight yet prone to significant heat loss and overheating. Solid or tiled roofs already offer better insulation but may still need upgrading to improve energy efficiency. Knowing your roof type ensures you choose suitable materials and avoid insulation methods that could cause condensation or structural issues.
Step 2: Assess Heat Loss, Heat Gain, and Condensation
Before installing any insulation, carefully assess how your conservatory performs throughout the year. Pay attention to rapid heat loss during winter evenings, excessive heat buildup on sunny days, and condensation forming on roof panels or around joints. Draughts near roof frames or glazing bars are also common indicators of poor insulation. Identifying these issues helps you target the most problematic areas and prevents moisture or heat-loss problems after insulation is installed.
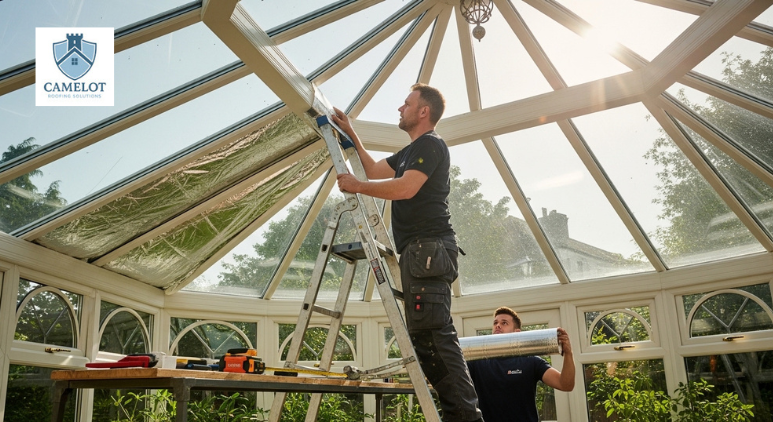
Step 3: Prepare the Conservatory Roof Area
Proper preparation is essential for insulation to perform effectively and last longer. This step involves cleaning roof panels and internal frames, repairing damaged seals or loose fixings, and removing any mold, damp patches, or trapped moisture. It is equally important to ensure ventilation routes remain open. Poor preparation can lead to condensation buildup, mold growth, and reduced insulation performance over time.
Step 4: Install the Chosen Insulation Method
The installation process varies depending on the insulation type selected. Thermal blinds or curtains are fitted beneath the roof glazing to create an insulating air layer. Foam or bubble insulation panels are cut to size and secured tightly beneath roof panels. Multifoil insulation is installed between rafters, with all overlaps sealed to prevent heat loss. Insulated roof panels or warm roof systems involve installing rigid insulation boards, waterproof membranes, and internal finishes such as plasterboard. In all cases, insulation must be fitted snugly without gaps to avoid heat leaks and cold bridges.
Step 5: Seal Joints and Draught-Proof the Roof
Insulation alone will not be effective if warm air can escape through gaps and joints. This step involves sealing around roof panels, glazing bars, eaves, and roof edges. Draught-proofing doors and windows connected to the conservatory also play a crucial role in maintaining stable indoor temperatures. Proper sealing significantly enhances the effectiveness of conservatory roof insulation and improves overall comfort.
Step 6: Improve Ventilation to Prevent Condensation
Effective conservatory roof insulation must be balanced with adequate ventilation to control moisture. Roof vents and trickle vents should remain fully functional, allowing air to circulate and warm, moist air to escape during colder months. Proper ventilation prevents condensation, damp issues, and mold growth, ensuring your insulation performs efficiently in the long term.
Step 7: Add Complementary Insulation Measures
To achieve the best results, conservatory roof insulation should be combined with other energy-saving upgrades. Floor insulation or thermal flooring helps reduce cold transfer from below, while wall insulation or internal panels prevent heat loss through the sides. Thermal curtains or blinds on doors and windows further improve temperature control. These measures work together to create a balanced, energy-efficient conservatory.
Step 8: Check Building Regulations and Permissions
If you are installing a solid or tiled conservatory roof, it is essential to check building regulations before work begins. This includes confirming structural load capacity, ensuring insulation meets required U-values, and determining whether planning permission is required. While professional installers usually handle compliance, homeowners should always verify requirements to avoid future legal or structural issues.
Step 9: Test Performance and Monitor Results
After insulation is installed, monitor how your conservatory performs. Check for improved temperature stability, reduced condensation, and lower heating or cooling costs. A well-insulated conservatory should feel noticeably warmer in winter, cooler in summer, and quieter during heavy rainfall.
Step 10: Maintain Your Insulated Conservatory Roof
Ongoing maintenance is essential to preserve conservatory roof insulation performance. Inspect seals and joints annually, clean roof liners, blinds, or panels, and address any leaks or moisture issues immediately. Regular maintenance extends the lifespan of your insulation and ensures consistent comfort throughout the year.
For the best long-term results, combine insulated conservatory roof panels with effective draught-proofing, floor insulation, and controlled ventilation. This approach creates a fully usable, energy-efficient conservatory suitable for everyday living.
While insulating a conservatory roof can be done using DIY methods, achieving the best thermal performance and long-term durability often requires professional expertise. Experienced roofer in Hackney can assess your conservatory roof type, recommend the most effective insulation system, and ensure correct installation that complies with building regulations.
For long-lasting protection and improved energy efficiency, contact trusted professionals offering roofing services. A professional inspection helps you choose the right solution avoid costly mistakes.
Best Methods for Insulating a Conservatory Roof
Insulating a conservatory roof is key to making the space comfortable all year round. Different methods are suitable depending on your roof type, budget, and whether you prefer a DIY or professional solution. Here’s a detailed explanation of each method:
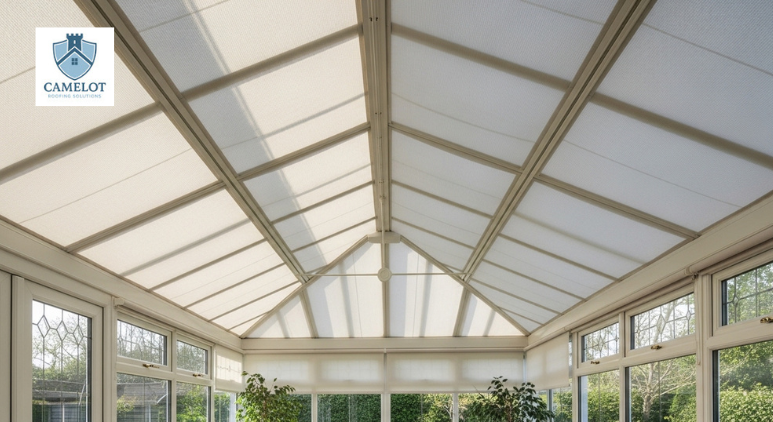
1. Thermal Curtains or Roof Drapes
Thermal curtains and roof drapes are soft insulation solutions that work by trapping air and reducing heat exchange through the roof.
Benefits:
Made from thick, heat-retaining fabrics, often with reflective linings.
- Installed either on rails inside the conservatory or attached directly to the roof frame.
- Traps warm air inside during cold months, blocks sunlight in summer to reduce overheating.
- Quick and cost-effective solution for glass or polycarbonate roofs.
- Adjustable to control natural light and privacy.
- Can complement other insulation techniques for better performance.
Drawbacks:
- Does not provide structural insulation, only reduces heat transfer.
- Requires manual adjustment or motorization for convenience.
Pro Tip: Combine thermal curtains with roof blinds for maximum efficiency. In winter, leave blinds closed at night to trap heat; in summer, open blinds in the morning and close by noon to prevent overheating.
2. Foam Panels or Bubble Insulation
Foam panels and bubble insulation are lightweight, flexible solutions that provide a thermal barrier under existing conservatory roof panels.
Benefits:
- Foam panels are cut to fit the shape of the roof, creating an insulating layer between the conservatory and the roof surface.
- Bubble insulation, often reflective, traps air and reflects radiant heat.
- Affordable, DIY-friendly, and lightweight, perfect for polycarbonate or glass roofs.
- Helps reduce heat loss in winter and keeps interiors cooler in summer.
- Can improve sound insulation, reducing rain and hail noise.
Drawbacks:
- Provides moderate insulation, not comparable to solid roofs.
- Needs precise fitting to prevent gaps, condensation, and heat leaks.
Pro Tip: Use a combination of foam panels and reflective bubble insulation for a layered effect, improving overall thermal performance.
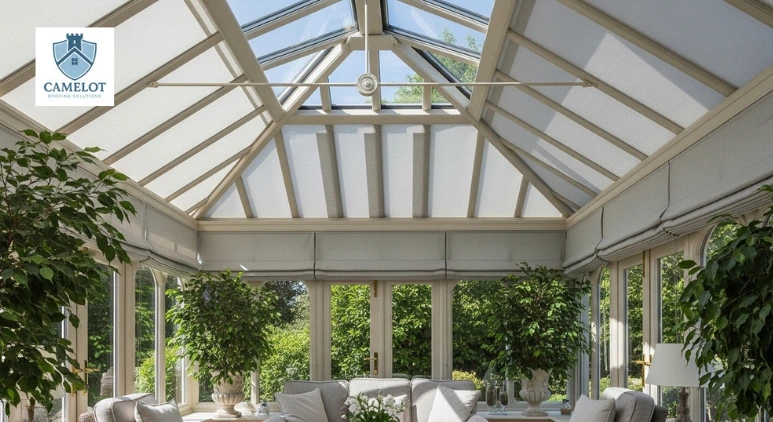
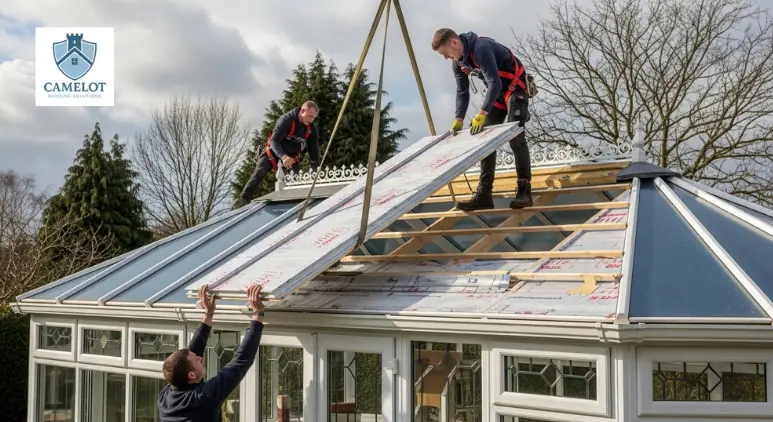
3. Installing an Insulated Conservatory Roof (Warm Roof)
A solid or warm roof is the most effective way to achieve maximum comfort and insulation in your conservatory. This method replaces the existing conservatory roof entirely.
Benefits:
- Provides the highest thermal insulation, keeping interiors warm in winter and cool in summer.
- Reduces noise from rain, hail, and wind.
- Existing glass or polycarbonate roof removed.
- Framework reinforced to support the heavier roof.
- Layers installed: rigid insulation boards, waterproof membrane, exterior tiles or slates, and interior plasterboard.
- Increases property value and allows the conservatory to be used year-round.
Drawbacks:
- Expensive upfront (depending on size and materials).
- Requires professional installation and may need planning permission.
Pro Tip: For maximum efficiency, pair the warm roof with underfloor insulation and double-glazed doors. This creates a fully energy-efficient, all-season living space.
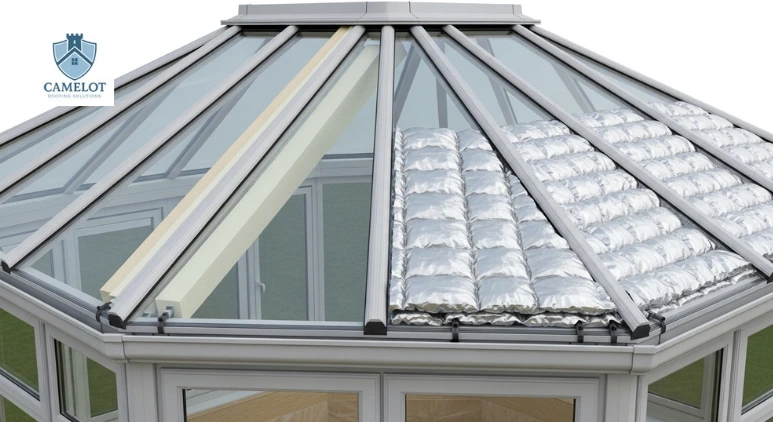
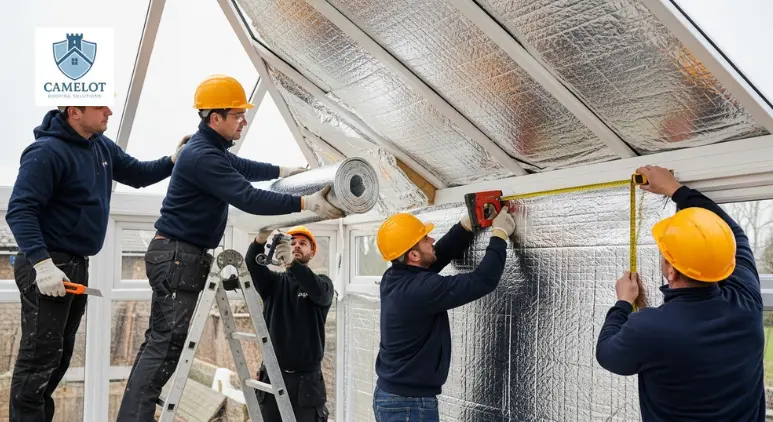
4. Aluminium Foil and Thermal Wadding
Aluminium foil and thermal wadding are reflective insulation materials commonly used in DIY projects.
Benefits:
- Lightweight, inexpensive, and easy to install for DIY enthusiasts.
- Enhances insulation when combined with other methods like thermal curtains or foam panels.
- Aluminium foil reflects radiant heat back into the room during winter.
- Thermal wadding provides air-trapping insulation, reducing heat loss through the roof.
- Can be installed behind plasterboard, between rafters, or under polycarbonate sheets.
Drawbacks:
- Only partially effective compared to full roof replacements.
- Must be installed correctly to avoid condensation and reduce the risk of mold.
Pro Tip: Ensure all joints and overlaps are sealed with heat-resistant tape to prevent gaps and maximize efficiency.
5. Thermal Blinds or Roof Drapes
Thermal blinds work similarly to curtains but are mounted directly under the roof or glazing for adjustable insulation.
Benefits:
- Flexible solution that can be automated for convenience.
- Reflective material retains heat in winter and blocks excessive sunlight in summer.
- Blinds can be fully opened, closed, or partially adjusted to optimize comfort and light.
- Improves thermal performance without major renovations.
Drawbacks:
- Only improves insulation moderately.
- Requires precise fitting to avoid draughts.
Pro Tip: Motorized thermal blinds allow timed opening and closing based on sunlight, maximizing energy efficiency.
6. Solar Control Film
Solar control film is a thin, transparent layer applied to glazing that reduces heat gain and UV damage.
Benefits:
- Blocks and reflects UV rays, preventing overheating in summer.
- Can improve energy efficiency by reducing the need for air conditioning.
- Retains natural light while controlling temperature.
- Protects furniture, fabrics, and flooring from UV fading.
- Can be retrofitted without removing existing panels.
Drawbacks:
- Minimal improvement in winter insulation.
- Needs professional application for long-term adhesion and durability.
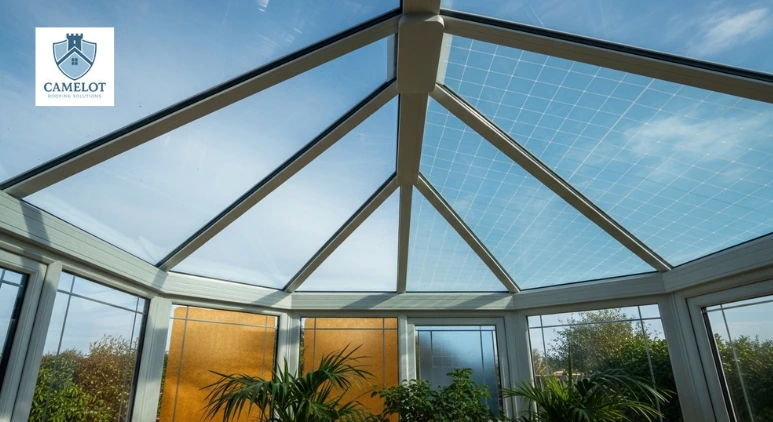
7. Upgrading Polycarbonate Roof Panels
Upgrading from single-wall to multi-wall polycarbonate panels improves insulation significantly.
Benefits:
- Multi-wall panels trap air between layers, reducing heat transfer.
- Can be combined with liners or internal insulation for added efficiency.
- Lightweight, affordable, and relatively easy to install.
- Reduces heat loss and summer overheating compared to single-wall panels.
Drawbacks:
- Moderate insulation; still less effective than solid roofs.
- Needs professional fitting to avoid gaps and condensation.
8. Insulated Roof Panels
Prefabricated insulated conservatory roof panels provide a solid solution for existing glass or polycarbonate roofs.
Benefits:
- Panels consist of rigid insulation sandwiched between waterproof external surfaces and internal finishes.
- Installed over the existing roof structure or as replacement panels.
- High thermal efficiency.
- Reduces noise from rain and weather.
- Can be combined with skylights for natural light.
Drawbacks:
- More expensive than DIY methods.
- Professional installation recommended.
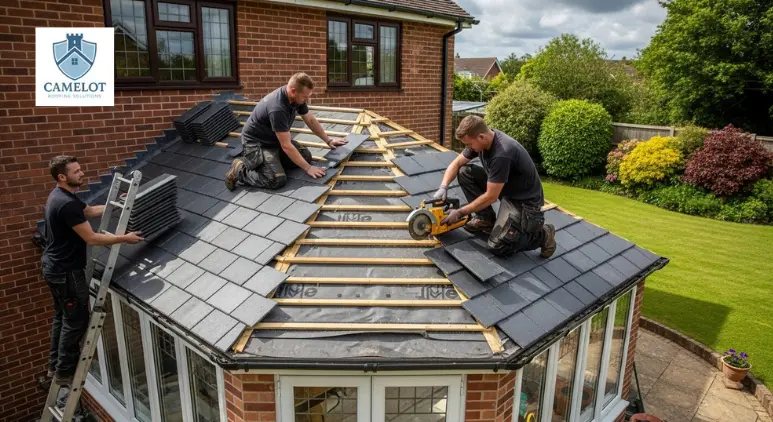
9. Tiled Roof
Replacing your conservatory roof with a fully tiled roof offers maximum insulation and a traditional aesthetic.
Benefits:
- Best year-round insulation.
- Durable and low maintenance.
- Reduces external noise significantly.
Drawbacks:
- Highest upfront cost.
- Heavier, requires a strong framework and possibly planning permission.
10. Multifoil Insulation
A modern alternative to foil and wadding, multifoil insulation is lightweight and reflective.
Benefits:
- Reflects heat in winter and prevents heat gain in summer.
- Usually installed under roof panels or between rafters.
- Lightweight and easy to install.
- Can improve insulation for both glass and polycarbonate roofs.
Drawbacks:
- Best used in combination with other methods for maximum effect.
- Limited noise reduction.
Not sure which insulated conservatory roof panels are best for your home? Contact our roofers in Hackney for professional advice and installation guidance.
Extra Insulation Tips to Transform Your Conservatory Space
Even if a full conservatory roof replacement isn’t an option, there are several extra conservatory roof insulation tips that can completely transform your conservatory space and significantly improve comfort and thermal efficiency.
- Floor insulation: reduces heat loss from cold concrete or tiled floors, keeping the space warm in winter and cool in summer.
- Wall insulation (inside and exterior): whether internal panels or external cladding, prevents heat escape and minimizes draughts.
- Draught proofing doors & windows: ensures warm air stays in and cold air stays out
- Thermal blinds & curtains: help regulate temperature and retain heat.
- Gutter & eaves sealing: prevents unwanted cold air and moisture from undermining your insulation efforts.
These methods complement insulated conservatory roof panels and reduce energy bills.
Professional vs DIY Insulation
Deciding between DIY and professional insulation depends on your conservatory’s roof type and project size. DIY works well for small upgrades like thermal curtains, reflective foil, bubble insulation, or sealing gaps. It’s cost-effective, quick, and only requires basic tools and skills.
For larger projects, such as solid or tiled roofs or full insulated conservatory roof panels, professional installation is recommended. Expert roofers in London ensure correct fitting, compliance with building codes, proper ventilation, and structural safety, while minimizing risks like leaks or condensation. Hiring professionals guarantees maximum insulation performance and long-term comfort.
Conclusion
Insulating your conservatory roof transforms the space into a comfortable, energy-efficient area you can enjoy year-round. From simple DIY solutions like thermal blinds to professional conservatory roof insulation, the best approach depends on your budget, roof type, and comfort goals. Combining conservatory roof insulation with complementary techniques like floor, wall, and draught-proofing ensures maximum efficiency and comfort. For optimal results, always consider professional advice for installation and material selection.
FAQ’s
What is the best insulation for a conservatory roof?
The best insulation for a conservatory roof is a solid insulated (warm) roof system. It uses rigid insulation boards layered with a waterproof membrane and internal plasterboard, providing excellent thermal performance.
Does insulating a conservatory roof work?
Yes, insulating a conservatory roof works extremely well. Proper insulation can reduce heat loss by up to 50%, lower energy bills, minimize condensation, and make the conservatory comfortable in all seasons.