A leaking roof is a serious issue for any UK homeowner. Even minor leaks can lead to damp walls, mold growth, timber damage, and costly repairs if left untreated. With the UK’s frequent rain, storms, and harsh winters, timely roof maintenance and repair are essential to protect your home.
This guide explains the most common causes of roof leaks in UK homes and provides a detailed, step-by-step guide on how to fix a leaking roof. It also highlights when to call professional roofers in Hackney for a long-lasting solution.
Understanding the Causes of Roof Leaks in UK Homes
Before repairing a leaking roof, it’s essential to understand the common causes of roof leaks in UK homes. Identifying the root cause ensures that repairs are effective, long-lasting, and prevent future problems.
1. Weather and Environmental Damage
The UK’s unpredictable weather is a leading factor for roof leaking repair. Heavy rainfall, strong winds, and storms can dislodge tiles or slates, damage flashing, and wear down roofing materials over time. Roof leaks often appear after prolonged storms, making regular inspection and timely repairs critical for UK homeowners.
2. Ageing Roof Materials
Most UK roofs have a lifespan of 20–50 years depending on the material. Over time, tiles, slates, or roof membranes can crack, warp, or become brittle, allowing water to penetrate. Regular maintenance and timely replacement of worn materials help prevent leaks before they escalate.
3. Faulty Flashing
Flashing is the metal lining around roof junctions such as chimneys, skylights, vents, and roof valleys. Damaged, rusted, or improperly installed flashing is a common source of leaks, as water can easily seep through these vulnerable areas. Ensuring that flashing is intact and properly sealed is essential for leaking roof repair.
4. Blocked Gutters and Downpipes
Leaves, moss, and debris can block gutters and downpipes, causing water to overflow onto roof edges or seep under tiles. This can cause structural damage and increase the likelihood of interior leaks. Regular gutter cleaning is a simple but highly effective way to prevent roof leak issues.
5. Poor Roof Maintenance
Neglecting routine inspections or delaying minor repairs allows small issues to become major leaks. Ignoring moss growth, failing to reseal penetrations, or postponing broken tile replacement can lead to serious roof repair leak problems over time.
Signs You Have a Leaking Roof
Before reaching for a ladder, confirm you’re actually dealing with a roof leak and not another issue like a burst pipe or condensation. Key signs include:
Interior Signs
- Brown or dark water stains on ceilings or walls.
- Damp patches in lofts or attic spaces.
- Peeling paint or wallpaper near the roofline.
- Musty smells or visible mold growth.
Exterior Signs
- Missing, cracked, or displaced tiles or slates.
- Sagging areas on the roof surface.
- Rusted, loose, or damaged flashing.
- Blocked or overflowing gutters causing water to run down walls.
Even if water appears inside the home, the leak may originate far from the visible damage. Correctly identifying the source is the first step in fixing leaking roofs successfully.
How To Fix A Leaking Roof (Step-by-Step)
Repairing a roof leak requires careful inspection, proper preparation, and methodical execution. Tackling the problem in a structured way ensures that the repair is effective, long-lasting, and prevents further damage.
Step 1: Locate the Source of the Leak
The first step in fixing a leaking roof is accurately identifying where the water is entering. Roof leaks often travel along beams and joists, meaning the visible water inside your home may not indicate the actual leak location. Begin by inspecting ceilings, lofts, and attic spaces for dark stains, damp patches, peeling paint, or signs of mold.
Once you’ve examined the interior, inspect the exterior of the roof, looking for missing, cracked, or displaced tiles, damaged flashing, or gaps around vents and skylights. On a dry day, using a garden hose to gently spray sections of the roof while monitoring the interior can help pinpoint hidden leaks. Correctly locating the source ensures that repairs target the root cause and prevent future issues.
Step 2: Clear Gutters and Downpipes
Blocked gutters and downpipes are a common cause of roof leaks in the UK. Leaves, moss, and debris can obstruct the flow of rainwater, causing it to overflow onto roof edges or back up under tiles, potentially damaging the roof structure. Begin by removing debris from gutters and flushing them with water to ensure proper flow.
Inspect joints and corners for cracks, gaps, or rust, and seal them if needed. Installing gutter guards can help prevent blockages and reduce the risk of leaks, while regular cleaning at least twice a year is a simple way to maintain roof integrity.
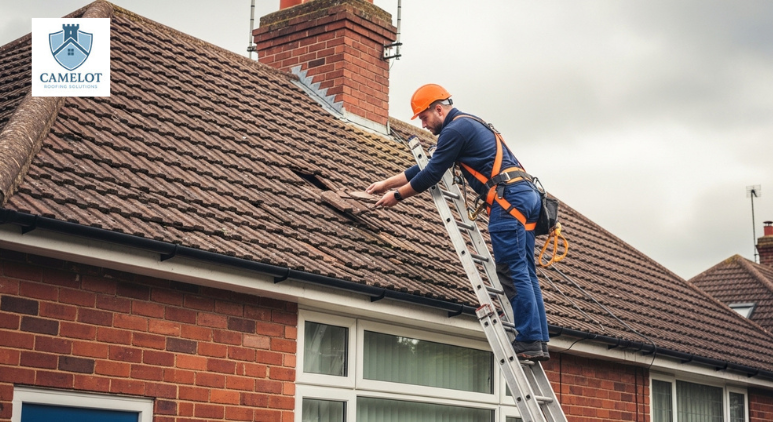
Step 3: Replace Broken or Slipped Tiles
Damaged or displaced tiles are one of the most frequent causes of roof leaks, but replacing them requires precision. Carefully lift the tiles above the damaged one using a slate ripper or pry bar, then remove the broken tile without disturbing surrounding tiles. Slide a replacement tile into position, securing it with nails or clips, and ensure it sits flush with adjacent tiles to maintain a watertight surface.
Using replacement tiles that match the existing roof is important for both durability and appearance. Properly aligned tiles prevent water penetration and extend the roof’s lifespan.
Step 4: Repair or Replace Damaged Flashing
Flashing is the metal lining around roof junctions such as chimneys, skylights, valleys, and vents, and faulty flashing is a common source of leaks. Inspect it for rust, cracks, or loose edges. Minor cracks can be sealed with a high-quality bitumen-based roofing sealant, while severely damaged flashing should be replaced with new galvanized steel or lead flashing.
Install the new flashing under surrounding tiles or slates and seal the edges carefully for long-lasting roof leak repair. Properly installed flashing can last decades and is crucial for protecting your home against the unpredictable climate of the UK.
Step 5: Reseal Roof Penetrations
Roof penetrations, including pipes, vents, and skylights, are prone to leaks because sealants deteriorate over time. Remove any old, hardened sealant and apply a fresh layer of roof-grade silicone or bitumen sealant around the penetration.
Smooth the edges to ensure complete waterproof coverage. Resealing these vulnerable areas prevents water from entering hidden sections of your roof and is an essential step in a long-term roof maintenance strategy.
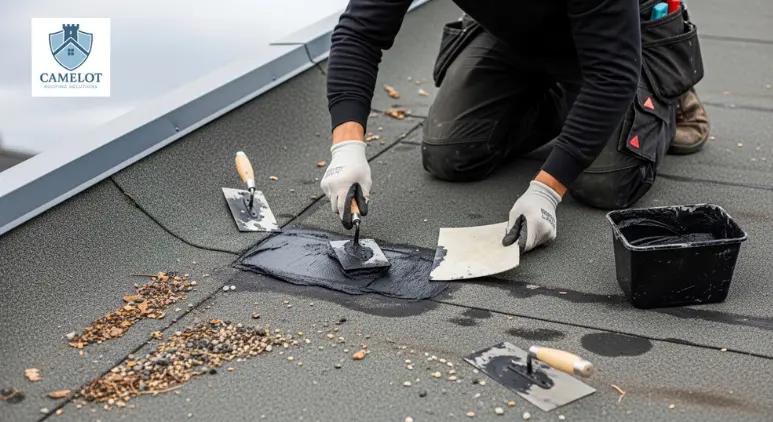
Step 6: Flat Roof Leak Repair
Flat roof sections, such as garage extensions or loft conversions, are especially vulnerable to leaks due to water pooling and membrane damage. Inspect the flat roof carefully for cracks, blisters, or low spots where water collects. Clean and dry the affected area before applying a flat roof patch or roofing cement.
For extensive damage, replace the damaged membrane, ensuring that edges overlap and are sealed thoroughly. Early maintenance of flat roofs is critical to fix a leaking roof in UK homes and prevents water from causing structural damage.
Step 7: Temporary Protection Before Final Repair
If repairs cannot be completed immediately or adverse weather is approaching, temporary protection is essential to prevent further damage. Cover the leak area with a tarp or roofing felt and place buckets inside to catch any dripping water.
Protect furniture and valuables from potential exposure. Temporary measures safeguard your home while awaiting permanent roof repair leak solutions. If you’re unsure about DIY repairs, our roof repairing service can assess the damage and recommend the best solution to safeguard your home and prevent costly damage.
When to Call a Professional Roofers in London
Some roof issues require expert attention:
- Extensive tile damage or multiple leaks.
- Sagging roof structure or rotten timber.
- Complex flashing or junction repairs.
- High, steep, or difficult-to-access roofs.
- Persistent leaks after attempted DIY repair.
Professional roofers in London offer insurance-backed work, proper equipment, and long-term solutions, ensuring your home remains safe and dry.
Maintenance Tips to Prevent Future Leaks
- Inspect the roof at least twice a year (spring and autumn).
- Clear gutters and downpipes regularly.
- Trim overhanging trees to prevent roof damage from branches.
- Reseal penetrations annually to maintain watertight integrity.
- Schedule professional inspections every 1–2 years.
Conclusion
Fixing a leaking roof is essential to protect your UK home from water damage, dampness, and structural decay. By identifying leaks, repairing damaged tiles and flashing, and resealing penetrations, homeowners can ensure a long-lasting, watertight roof. Always prioritize safety and know when to call a professional roofer.
FAQs
How long does a typical roof repair take?
Most minor roof repairs can be completed within a few hours to one day, depending on weather conditions and accessibility. However, larger repairs involving flashing replacement, structural fixes, or flat roof membranes may take one to three days to complete properly.
What is the best material to repair a roof leak?
Asphalt roof cement is one of the best materials for repairing small roof leaks because it creates a strong, waterproof seal and works well on cracks, flashing, and damaged areas. For larger or more complex leaks, replacement tiles, lead flashing, or bitumen-based sealants are commonly used in the UK to ensure long-lasting protection.