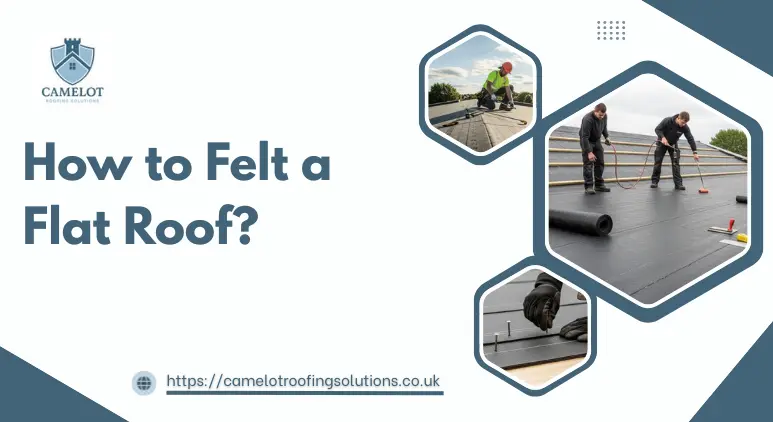
Flat roofs are a modern, space-saving design solution for homes, extensions, garages, and sheds. However, they are prone to water pooling, leaks, and weather damage if not properly protected. Felt flat roofing is one of the most reliable ways to ensure a flat roof remains waterproof and durable for years if it is installed properly and done by experts Local roofers in London. This guide will explain everything you need to know about how to felt a flat roof, with detailed step-by-step instructions, materials, costs, and maintenance tips.
What is Roofing Felt?
Roof felt is a bitumen-based membrane that provides a waterproof layer for flat roofs. It usually comes in rolls and can be reinforced with fiberglass or polyester for extra strength. Flat roof felt prevents water from penetrating the roof structure, protecting your property from leaks and structural damage. Felt is suitable for homes, garages, and even smaller spaces like roof felt for sheds.
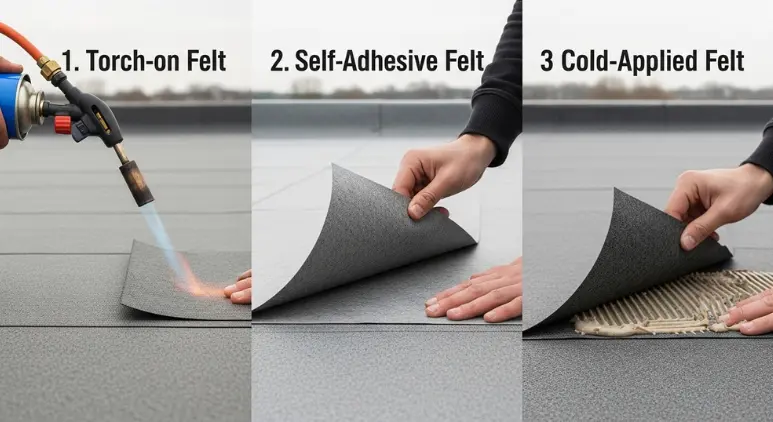
Types of Roofing Felt
Torch-on Felt
- Professional-grade, heated with a propane torch.
- Very durable, long-lasting, ideal for large roofs or garage roof felt.
Self-Adhesive Felt
- Sticks directly to the roof without heat.
- Easier for DIY projects, slightly less durable.
Cold-Applied Felt
- Uses a sticky bitumen layer without heat.
- Suitable for small roofs or re-felting a flat roof.
Pro tip: Choose high-quality flat roofing felt rated for flat roofs. A thicker felt (3–4 mm) offers longer-lasting protection.
Tools and Materials Needed
Before you start laying a flat roof, ensure you have everything:
- Roofing felt rolls (size depends on roof dimensions)
- Bitumen primer or adhesive
- Propane torch (for torch-on method)
- Roofing nails or staples
- Roofing roller
- Utility knife or roofing cutter
- Measuring tape
- Safety gear: gloves, goggles, boots
Tip: Correct tools make installing roofing felt easier and safer.
How to Felt A Flat Roof: Step-by-Step Guide
The following professional steps are carried out by our experienced and professional roofers in London, ensuring every flat roof is installed safely, accurately, and to the highest industry standards. These same steps can also help homeowners understand the correct process before attempting DIY felting with extra care or hiring experts.
Step 1: Prepare the Roof Surface
Proper preparation is the foundation of a successful felt installation. Start by removing all old felt, debris, moss, and dust from the roof deck. Inspect the surface closely and repair any cracks, holes, or rotten timber using roofing cement or a suitable filler. Once repairs are complete, sweep the surface thoroughly to ensure nothing is left that could prevent the felt from bonding correctly. If the roof deck is uneven, apply a levelling compound to eliminate any highs and lows. A clean, smooth, and structurally sound surface is essential before any felt is laid.
Step 2: Apply a Bitumen Primer
Using a brush or roller, apply a thin, even coat of bitumen primer across the entire roof surface, paying particular attention to corners, edges, and any repaired areas. The primer penetrates the deck and creates a chemical bond that dramatically improves felt adhesion.
Allow the primer to dry fully, which typically takes 30 to 60 minutes depending on temperature and conditions. Do not rush this stage, applying felt to an unprimed or wet surface is one of the most common causes of bubbling and premature lifting
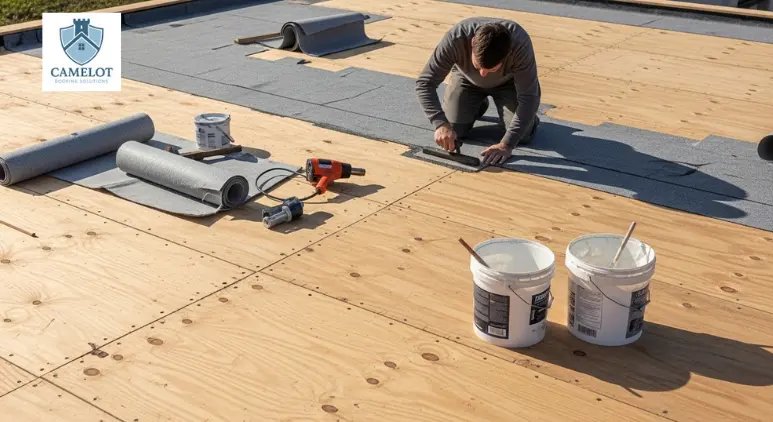
Step 3: Measure and Cut the Felt
Measure the full dimensions of the roof carefully before cutting anything. Cut the felt into manageable strips that can be handled without folding or creasing. Plan your overlaps in advance, allow 75 to 100 mm on side laps and 100 mm on end laps.
Numbering each strip in the order they will be laid helps avoid confusion and keeps the installation process smooth and efficient, particularly on larger roofs.
Step 4: Lay the First Layer (Underlay)
Begin at the lowest edge of the roof and work upward so that each subsequent layer overlaps the one below, directing water away from seams rather than into them. If using a torch-on felt, carefully heat the underside of the roll with a propane torch as you unroll it, pressing it firmly onto the primed surface as you go.
The felt must lie completely flat with no wrinkles or air pockets. Overlap edges correctly and avoid walking on the freshly laid felt as unnecessary pressure can stretch or distort it before it has fully bonded..
Step 5: Lay the Second Layer
Lay the second layer in the same direction as the first, but stagger the joints so that no two seams sit directly on top of each other. This offset pattern is critical, aligned seams create a weak point where water can work its way through over time. Maintain overlaps of 75 to 100 mm on side laps and 100 mm on end laps. Apply bitumen sealant along all seams, overlaps, and junctions to create a continuous waterproof bond.
As you lay each strip, smooth out any air bubbles or ridges firmly with a roofing roller, working from the center outward toward the edges. Trapped air will cause blistering and early failure, so take your time at this stage. Proper joint staggering and thorough sealing are what separate a roof that lasts decades from one that fails within a few years.

Step 6: Secure the Felt
Once both layers are laid, fasten the felt firmly along all edges and overlaps using roofing nails or staples spaced every 150 to 200 mm. After nailing, roll over the surface again with the roofing roller to eliminate any remaining trapped air and ensure full contact between the felt and the deck.
Be careful not to over-nail, as too many fixings in the same area can puncture the felt and create entry points for water.
Step 7: Seal Edges, Corners, and Joints
The edges, corners, and any points where the roof meets a wall, chimney, vent, or skylight are the most vulnerable areas on any flat roof. Apply roofing cement or additional bitumen sealant generously along all edges and upstands.
Press the felt snugly into all junctions and angles, ensuring there are no gaps or loose sections. These details are where most flat roof leaks begin, so work methodically and do not cut corners at this stage.
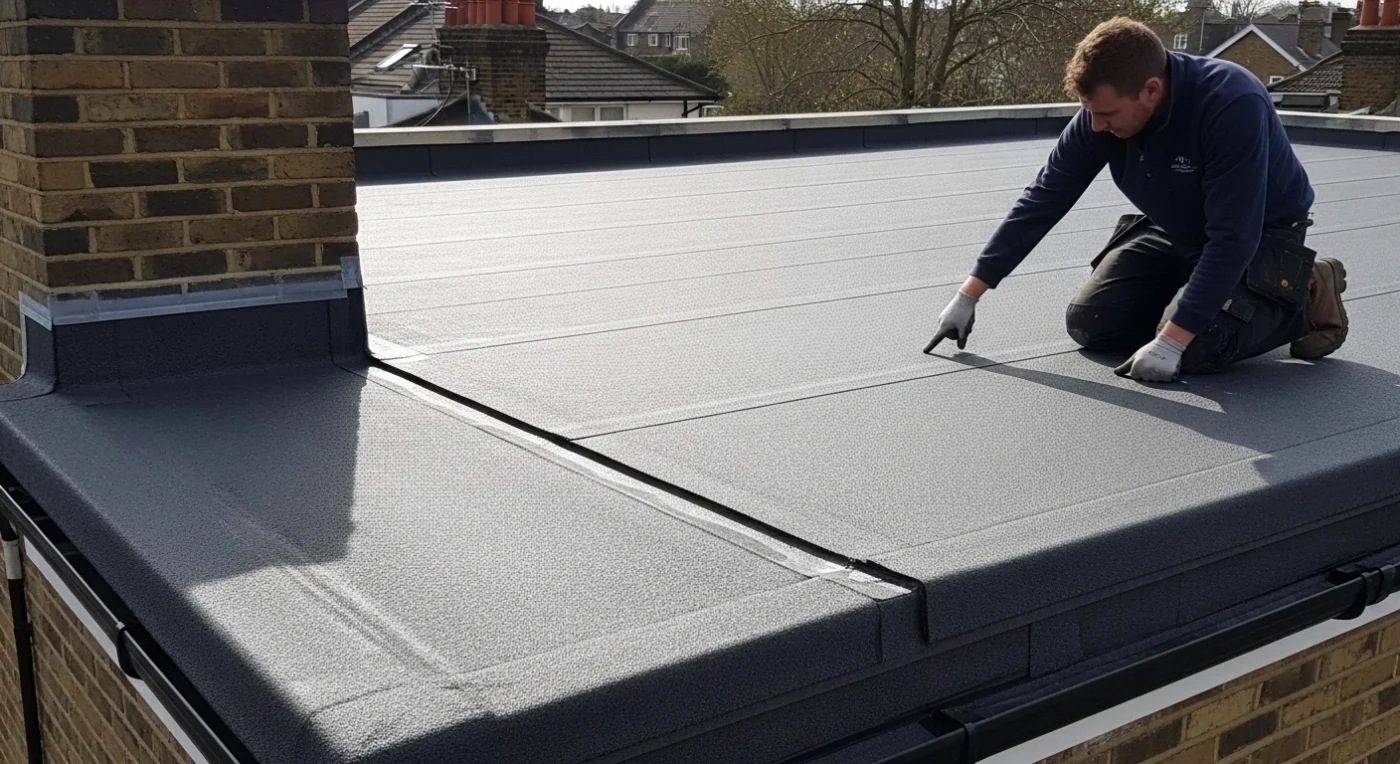
Step 8: Inspect the Finished Roof
Once the installation is complete, carry out a thorough inspection before considering the job done. Check the entire surface for wrinkles, bubbles, or gaps. Examine every corner, joint, edge, and overlap to confirm they are fully sealed and bonded.
For additional assurance, lightly spray the roof with water and observe carefully for any signs of leakage or pooling at weak points. Address any issues immediately while materials and tools are still on hand. A careful final inspection is what ensures the roof performs reliably for years to come.
While felting a flat roof can be a rewarding DIY project, not every roof is suitable for self-installation. If your roof is large, difficult to access, badly damaged, or requires torch-on felt, it’s often safer and more cost-effective to seek expert help.
Hiring expert roofers in Hackney ensures the job is completed to industry standards, using high-quality flat roofing felt and proper safety procedures. Skilled roofing specialists can accurately assess roof conditions, reinforce vulnerable areas, expertly seal edges and joints, and deliver long-lasting waterproof protection, helping to prevent leaks, structural damage, and premature roof failure.
Common Mistakes to Avoid in Roof Felting
- Skipping the primer when fitting roofing felt
- Incorrect overlaps
- Ignoring edges and corners
- Using low-quality felt
- Walking on unbonded felt
Maintenance Tips
- Inspect annually, especially after storms
- Remove debris and standing water
- Apply sealant every few years
- Repair minor cracks immediately to prevent leaks
- Proper care extends the life of roof felt for sheds, garage roof felt, or any flat felt roof
Lifespan of a Felted Roof
With proper installation and regular maintenance, a felted roof can last 15–25 years. Watch for signs of wear such as bubbles, peeling, water pooling, or leaks, and address them promptly to extend the life of your felt flat roofing.
For complete peace of mind, our team offers expert flat roofing services in London, providing professional inspections, repairs, and maintenance to ensure your roof stays fully waterproof, durable, and in top condition for years to come.
Conclusion
Felting a flat roof is one of the most effective ways to protect your property from water damage. By carefully following these detailed steps, using quality roof felt, and performing regular maintenance, you can achieve a durable, waterproof roof. Whether it’s a shed, garage, or main building, how to felt flat roof correctly ensures long-lasting results, reliable protection and peace of mind.
FAQS
What should you put under roofing felt?
Roofing felt should be laid over a solid roof deck, typically exterior-grade plywood or OSB3 boards. In many installations, a felt underlay or vapour control layer is added to protect the structure and improve moisture resistance.
Do you need a membrane under roofing felt?
A membrane is not always mandatory, but a vapor control layer or breathable membrane is strongly recommended, especially on warm flat roofs. It helps prevent condensation, protects insulation, and improves overall roof performance.
How is roofing felt held down securely?
Roofing felt is secured using torch-on bonding, cold adhesive, or self-adhesive systems, with mechanical fixings applied at edges and joints. Correct fixing prevents wind uplift, movement, and water penetration.